
Better films every fortnight. Subscribe to Syrp Lab YouTube.
Like any filmmakers and photographers, we’ve got a lot of stuff here at Syrp Lab. Brilliant, state-of-the-art, magic-making stuff, but it takes up a lot of space. So in January 2022, we decided the time had come to tackle our dark, tiny gear room and turn it into something epic.
It was time to give our kit a space worth taking up; we would build our ultimate photo and video gear room. After all, it’s hard to make world class videos with cluttered gear. And, as designer Cynthia Rowley puts it, if you love your work space, you’ll love your work a little more.
We put our heads together to decide exactly what our new space would look like. We needed it to look good for filming, store our gear securely, make charging easy, grow with us and be able to be assembled in a about week. Our finished product? All of the above, and some. In fact, the room is so good it can be hard to actually leave to go on shoot.
We’re going to take you through the journey of our build, to give you a blueprint for creating your own gear space which makes staying organised, charged and clean that little bit easier. We’ll cover crafty tripod storage, battery management and charging, DIY drawer dividers and all the other little touches that make our new gear room an absolute dream.
We used the Manfrotto 300XM modular gimbal to document some of the project, which made shooting fast and smooth and enabled a wide variety of shots. gave us heaps of versatility. It was perfect for capturing the evolution of our design-to-DIY journey, enabling us to be nimble whilst filming a fairly hectic build process.
Ready to get your hands dirty? Let's go!
The Lead Up - Prep and Design
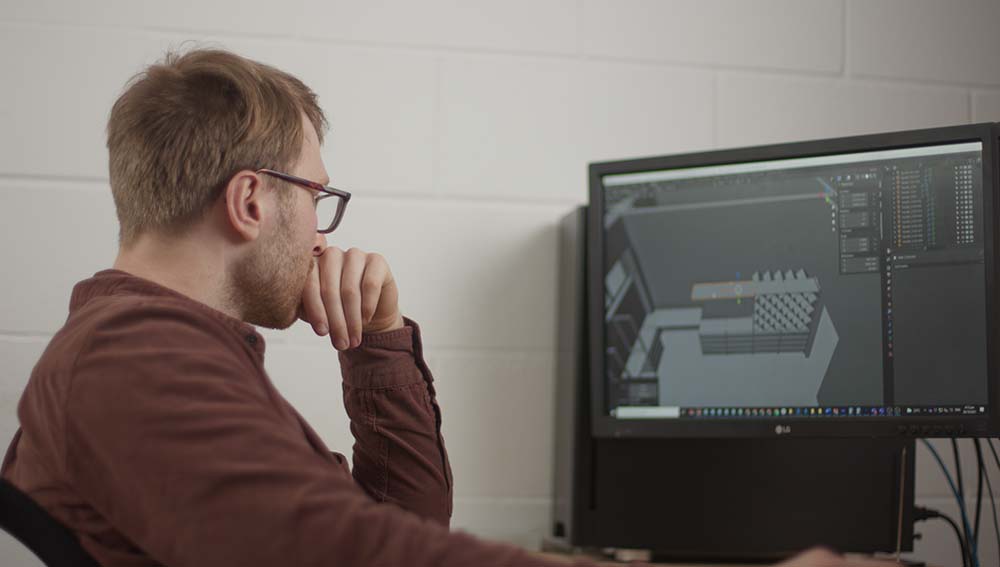
To get the design process started, Matt listed the gear into functional collections. That way, we could store gear that’s used together, together. Then, he mocked up the space in Blender and researched some shelving options. Once we were happy, we ordered what we needed and waited with baited breath.
When it arrived, it was all hands on deck.
Day 1 - Shelving
It was important to us to use quality materials to house our precious gear. We went with Lundia shelving for our build because it’s sustainable, locally made, modular and it really fits the Syrp Lab aesthetic. It’s not as cheap as a hardware-store metal racking option, but it lasts, and we reckon it was worth paying a bit extra for. We’re planning on getting a lot of use out of this gear room.
It cost us about $11,000 NZD ($7,400 USD / €6,500 Euro) all up for the shelving and the drawers, but this will vary based on your space and choices. The Lundia system slots together with pins, too, which makes it pretty simple to assemble. Don’t worry, we’re not sponsored - we just like them.
We went with shelves that were 457mm (18”) deep, so they would fit travel cases and bags as well as the drawer size we had in mind. We knocked them together, and had ourselves the beginning of our dream gear space.
Day 2 - DIY Drawer Dividers
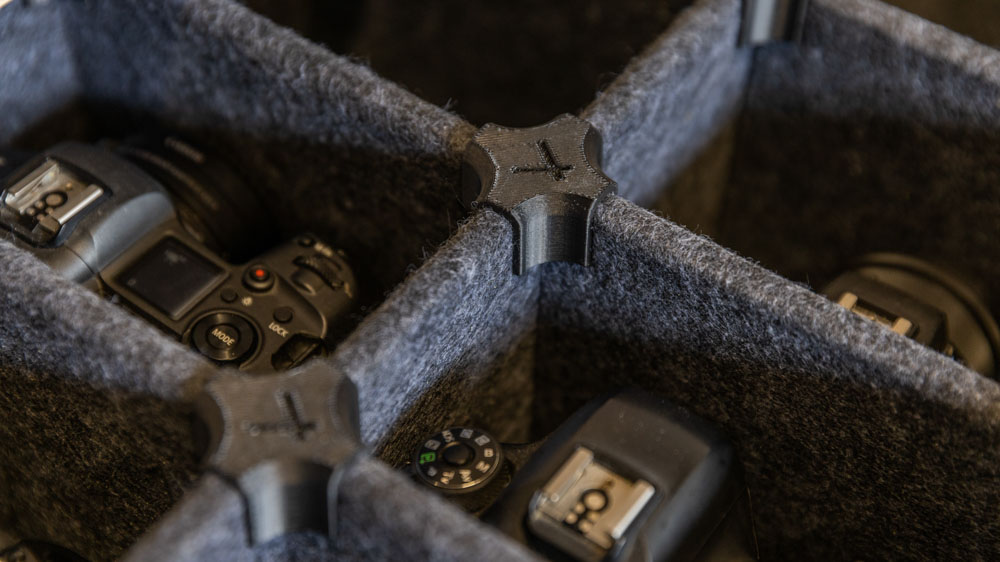
We’re pretty stoked with this creation, actually. We needed specific drawer dividers to house our lenses and other bits and bobs, and couldn’t find the perfect model. Instead of buying something mediocre online, we decided to make the ideal one ourselves.
Our design consisted of two pieces: an MDF core covered in felt, and small 3D-printed plastic joiners, which slide on and hold everything in place. This gives us a system that’s customizable for all our different sized pieces of kit.
There’s nothing more satisfying than everything having its own place which it can slot out of and back into, and that was our vision. Maybe we were boat dwellers in a previous life. We still use a lot of our old bodies for time-lapses, so we wanted them to slot in with their own rightful place alongside our mirrorless cameras.
When it comes to selecting material for the felt covering, it’s important to choose high quality stuff that protects your equipment, rather than marine carpet that might shed dust or fibres everywhere.
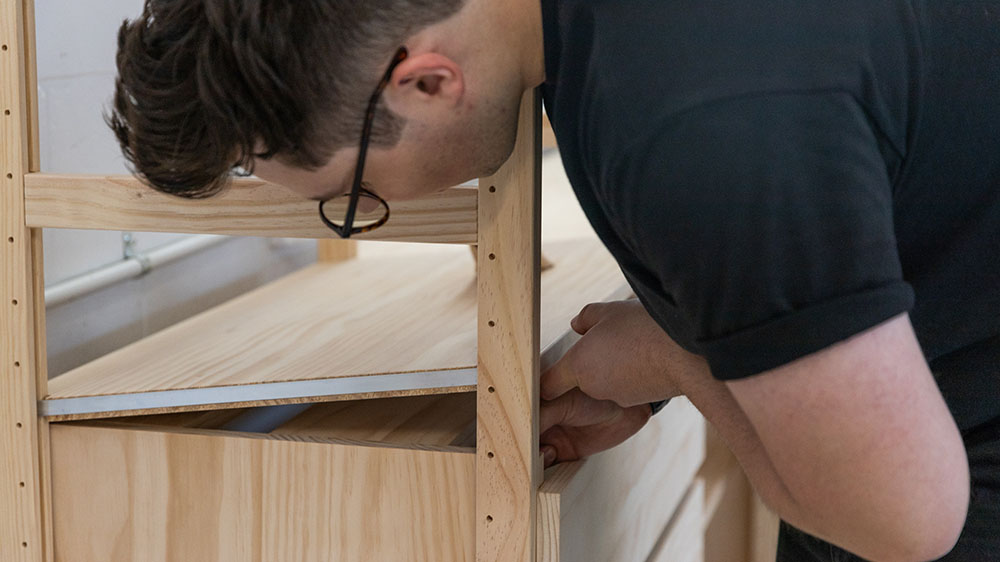
Alright, let’s get into the nitty-gritty. We went with 6mm (¼”)MDF and 3mm (⅛”) felt, and cut the MDF down into 120mm (4.7”) high divider sections. We covered these in the felt using spray glue; stretching the felt over the MDF isn’t too tricky, but for longer sections an extra pair of hands goes a long way. We clamped these down between some 2x4s while the glue hardened, and trimmed off the excess with a craft knife once dry.
While all this was going on, Matt got the connectors ready for 3D printing. If you want to print your own, you can download them here. Once we had the connectors ready, we could chop our dividers with the drop saw. This is when it got fun.
We cut our first one with the drop saw, using a sacrificial piece of MDF so we didn’t mess up the felt. Then, we could work out how long the rest of the dividers should be. Fast forward, and we were one drawer down, 15 to go.
To see more of the ins and outs, we’d highly recommend watching the video. That way, if you’re doing this yourself, you can see every little DIY detail. If you do, make sure you watch until the end - we’ve got a pretty insane giveaway that should tickle your fancy.
Like these Draw Dividers?
Well, you can have them too - we’re making them available as a 3D-print file with a hand guide.
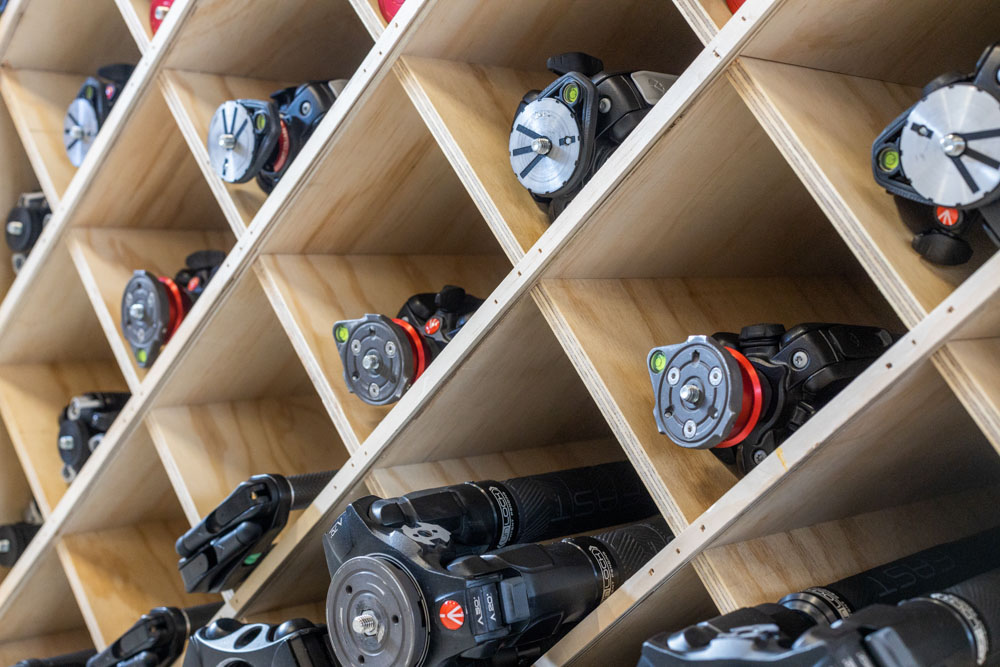
Day 4 - The Ultimate Tripod Rack
Why do something ordinary when you can do it with style? Why store tripods in something basic when you can store them in a custom designed lattice wine rack? This was our thinking, anyway. The easy option would have been a gridded cubby hole system, but that wasn’t going to cut the mustard.
We designed a wine rack-style lattice system, making our lives a little bit harder in the immediate and a whole lot better in the long run. This would stop the tripods bumping into each other like they would on a regular shelf, and keep those Manfrotto’s gleaming and scratch free.
The rack would slot in under the bench top giving us quick and easy access to our tripods. We decided to use plywood to match the aesthetic of the rest of the gear room. After cutting the long continuous sections, Matt added the shorter joiners to form the lattice.
To join everything together, we found glueing and brad nailing a strip along the edge added enough strength, with a screw from each side. We finished it off by screwing it into the benchtop and upright and adding a pine frame to the front. Italian red anyone?
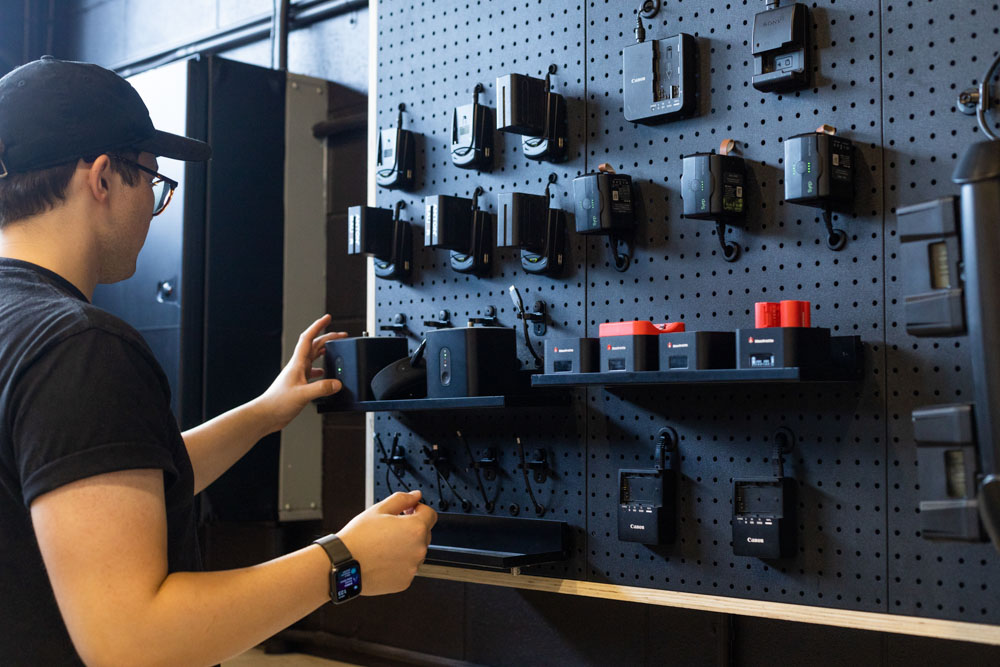
Day 5 - Our Dream Charging Station
Yep, we built a charge wall. Our vision was for empty batteries to go into the empties drawer on the left after a shoot. Then, they could be cycled through easy-to-see chargers on the wall, before being put in the charged drawer on the right, ready to be whisked off on shoot again.
For the base, we used metal peg board, both for aesthetics and so that we could attach neodymium magnets to the backs of all our chargers and everything would pop off and back on again. We did our homework and checked with an electrical engineer about attaching magnets to chargers - we got the all clear, but you can always use velcro if you’re not comfortable with this bit.
To hide the cables down the back, we drilled through the peg board with a step drill and fitted a rubber grommet to protect the cable. Even if we redesign in the future, these holes should still work and if not, a new peg board sheet doesn’t break the bank.
We attached the whole thing to a pine box and I tackled cable management with some zip ties. There wasn’t much to this - I bundled groups of cables together and attached them with the zip ties until they looked tidy.
We used a mix of our original chargers and the Manfrotto Pro Cubes for charging all of our Canon, Sony, Nikon and AA batteries. The cubes have a nifty LCD display, and can charge multiple batteries at once!
Right, time to mount our charging wall. We made sure everything was level, then attached some wooden mounts to the wall using masonry anchors. We used a French Cleat for this; two pieces of ply cut at 45° angles, allowing for easy removal and a bit of left to right movement.
And voila, we could step back and admire our handiwork. Our dark, cluttered space transformed into the ultimate gear room. Time to move in.
Our ultimate photo and video gear room
Now we could step back and admire our handiwork. Our dark, cluttered space transformed into the ultimate gear room, ready for the daily hustle and bustle of filming.

Enjoying Film Builds? Let us know in the YouTube comments and fire through any ideas of what you’d like to see us tackle next. Happy filmmaking, everyone!
Like the 3D printed draw dividers used in our gear room? Well, you can have them too - we’re making them available as a 3D-print file.