
Better films every fortnight. Subscribe to Syrp Lab YouTube.
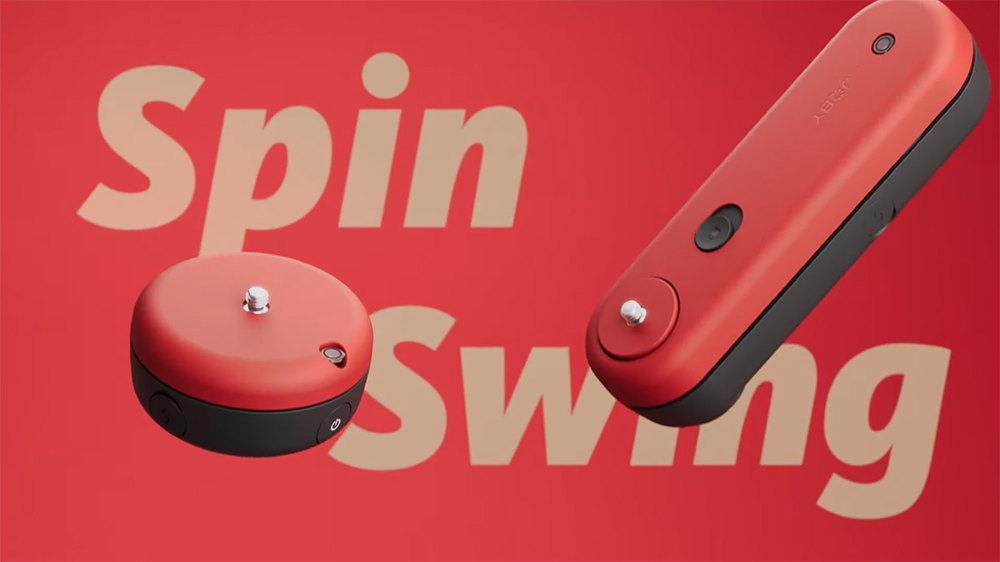
While it might seem like creating education videos for filmmakers is all Chase and Matt do here at the lab, one of our main gigs is shooting launch campaigns. So, when JOBY approached us to create one for their latest product, the Spin and Swing, we figured it was the perfect opportunity to shoot the whole process and then break it down for you all.
In this episode of Media Offline, we delve into the ins and outs of how to shoot a punchy launch campaign for an iconic creative brand.
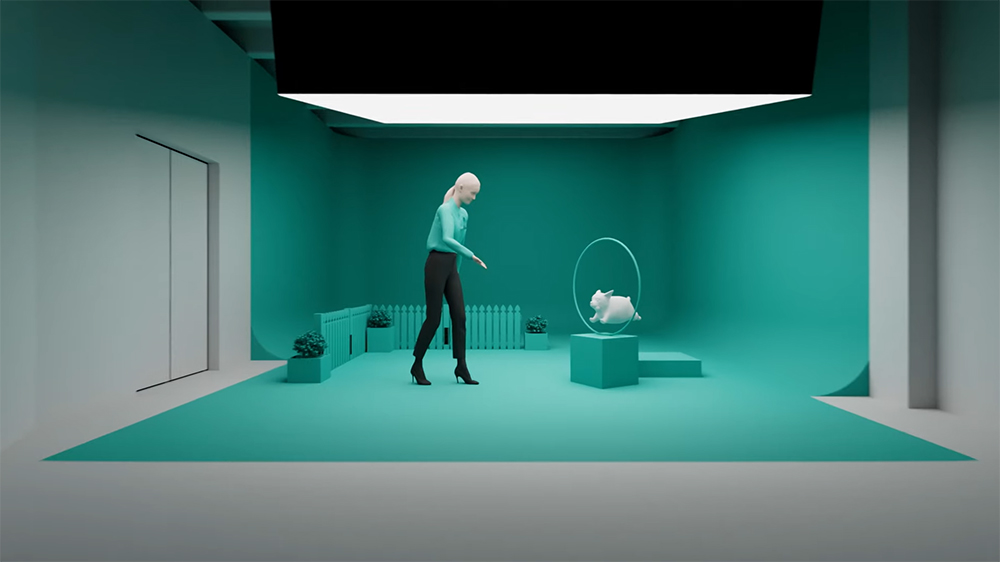
Chase: So, we pitched them this bright, stylised take on being a creator, with minimal colour pop sets. Everything was storyboarded out and pre-visualised in Blender, meaning we knew exactly how we were going to construct and light the scene in advance.
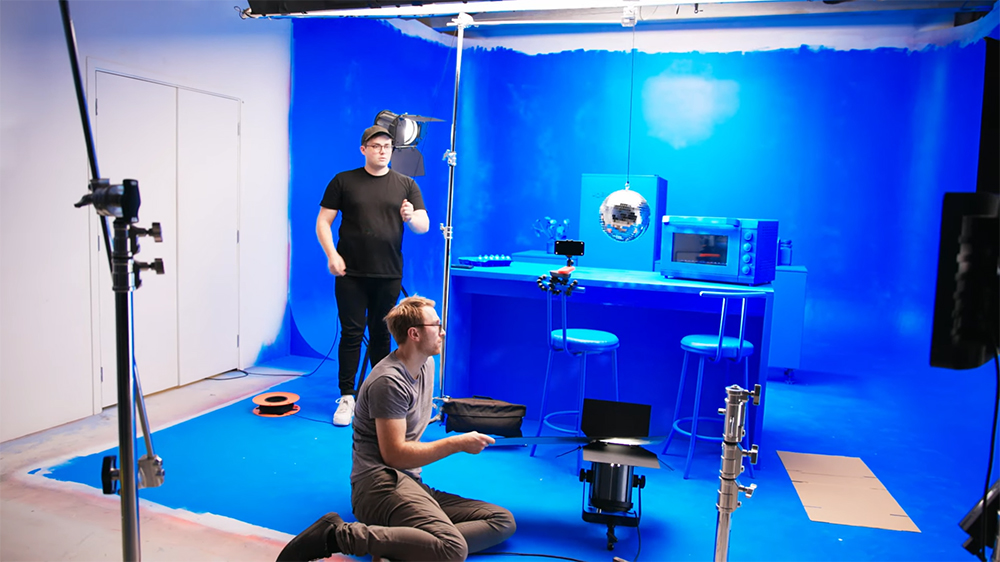
Matt: We considered doing it all on a green screen, but when we did the maths, it was going to be cheaper to repaint our set several colours. That way, we’re saving on post and don’t need to render our sets virtually. With pre-production in the can, we jumped into production with a lot of painting.
So what’s for real and what’s not?
For product video, a lot isn't even shot these days - production companies rely on renders to do moves that might be prohibitively time-consuming to shoot. You see this a lot in campaigns, from iPhones to cars. We usually prefer to shoot when we can but in this case, the choice wasn't so straight forward.
Matt: So when he actually throws the Spin and Swing up into the air, those are real, but the floating hero shots, well, we did all those with CG renders. It was kind of easy - we could just get the production 3D files that they used to make them. So it was really just a matter of texturing them and making them look real.
Chase: You say it’s easy, I could not do that!
Matt: Some things are easy, and then other things, like just getting the bubble level to look right and stuff…
Chase: It’s kind of that fun thing as well - when you’re working in product video, you’re trying to get it to look as perfect and fake as possible, and when you’re working in 3D renders you’re trying to get them to look not quite so perfect. So they look real.
Matt: Yeah exactly. I think a lot of time was spent looking at the actual materials the plastic had and adding that subtle deviation in texture to it. A real classic is people adding finger smudges and things like that, but when you’re doing perfect-looking products, that’s not something you’re going to do.
The reality of painting a bunch of sets.
The monocolour bright look is definitely eye-catching, but when it came to the reality of bringing it to life, we had some tough choices.
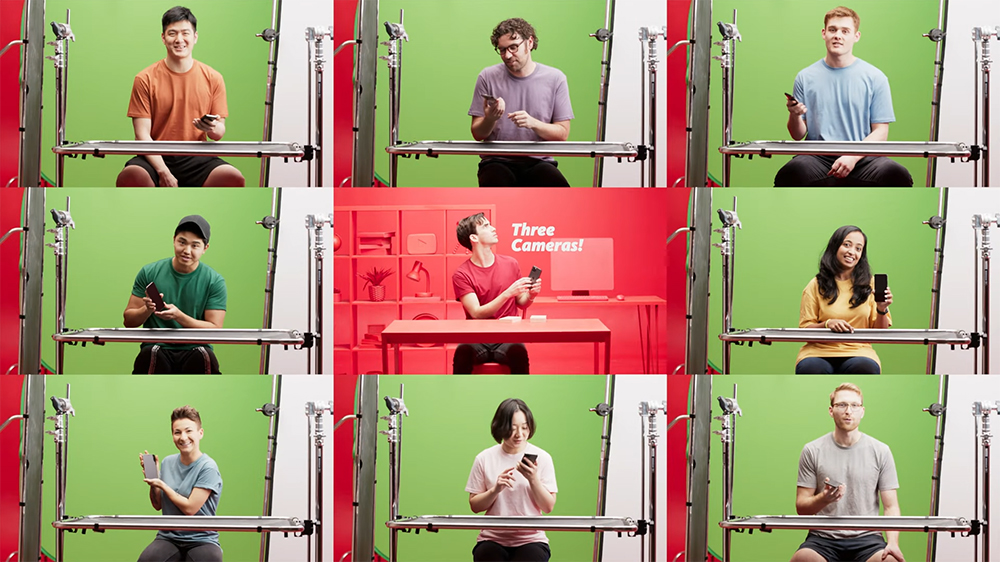
Chase: So we had this idea in the pitch to show a whole lot of tech reviewers. You know, whenever a new product comes out, there’s like a hundred videos on YouTube immediately about it, and they’re all kind of similar. We wanted to use a bunch of different colours but we finally said, ‘We’re not going to paint this nine different colours in a week!’
Matt: So we reluctantly dragged out the green screen. The shot in the middle, with our main tech talent, that was real. All the other shots are just a person sitting on a green screen, on a stool, with a black scrim (Manfrotto frame and cover) on their lap where the table would be. That way it created the shadow. And the reason we didn’t actually use the real table is because it’s bright red and we didn’t want that red spill on the talent. So the table in all the shots is fake.
Chase: Which means the box is in the exact same position on all the tables.
Matt: Because it’s such a quick shot, you can get away with so much.
Chase: It was an easy one, as well, because we had the background in red, so we could just hue shift it to the various colours and match it to the T-shirts we bought in bulk.
Matt: And, again, the T-shirts were shifted very slightly as well.
What about the screens?
Shooting devices can be tricky. You’ve often got to deal with an app for the device, too, and there’s an art to getting both to look good in the same shot.
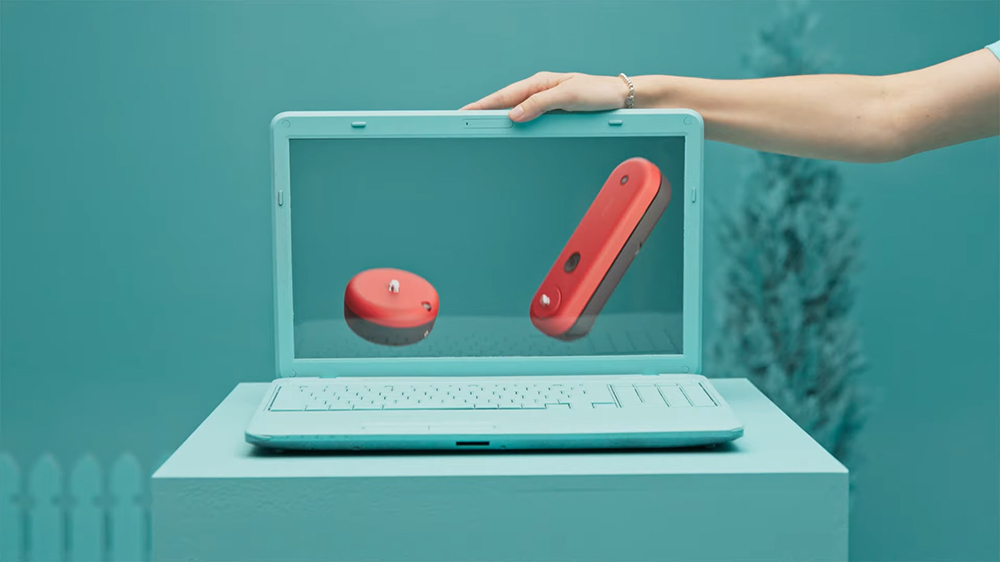
Matt: One thing you’ll probably notice is there’s a lot of screens that pop up in this video. Every single screen was done in post, and we’ve got a couple of tricks when it comes to that.
Chase: Well, it always makes me so mad when I see people painting their screens green, or using a green overlay to try and key it out afterwards. It’s such an inefficient way to do it.
Matt: Yeah, because the main thing you’re trying to do is make it look realistic. So, one of the hardest things to replicate is the reflections on the screen. The easiest thing to do is just leave the screen black, leave it turned off. You do need to add some tracking markers to link it all up afterwards, but by having a black screen you get to capture all those reflections.
Chase: And you get a natural looking surface. Like in the Macbook that we painted cream, it had that soft texture to it already, so it looks like it belongs in that space.
Matt: Yeah, definitely. And if you look at the way screens work, it’s basically light coming from behind the screen. So if you add an image to the screen and you set it to add mode, it’s effectively working the same way a screen does, so it naturally looks the same.
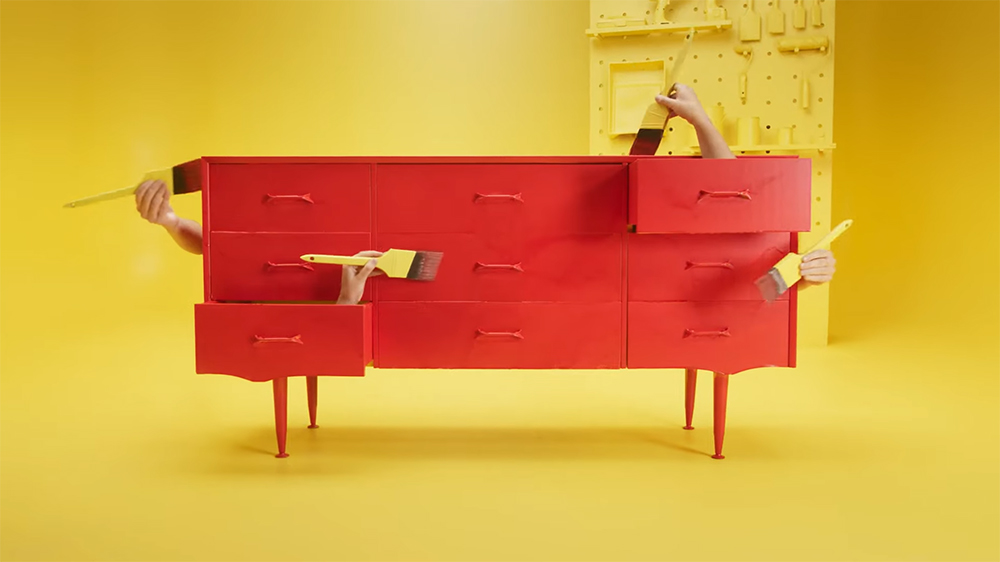
And the painting shots? Painting the cabinet in one: no tricks required.
We definitely could have gone down the VFX trick shot road with the painting shot. But, in reality, we could get the same result with the real thing - a simple, mostly in-camera shot.
Matt: We only had one go, really, at painting the cabinet. So that had to go right.
Chase: And we wanted to do something that was visually surprising without feeling completely unattainable. Pretty much everyone can see how that’s done - with multiple plates.
Matt: I think the one thing people will wonder is, ‘How did you get your arm inside the cupboard?’, which is a pretty simple answer.
Chase: You just chop the bottom out. We also have this scene where a disco ball drops in. We forgot to rent a DMX system that day. So, we just got two PAs to sit by the light switches. We’d call ‘3,2,1, Off!’ and switch them off at the exact time that you opened the barn doors of the frenel.
And the bright green Syrp Lab?
Chase: When it pulls out from the TV, obviously we did a screen replacement there, again. How did we match those two shots in post?
Matt: Well, it’s just two shots, right? And it was all the same lighting and everything like that. We literally just put the camera in two different positions, lined up the first shot with the wide, and then just punch-zoomed out between the two.
Chase: Opacity shift?
Matt: No. All motion blurred. When we’re sitting wide, what you can actually see on the screen is the close-up shot, and then it’s just feathered into the green around it.
Our biggest learning? The art of pre-planning.
Matt: I think this is one of the first projects where we really did that much pre-vis and pre-planning. We had drawings of the whole thing as well, so going into this we knew exactly what we were doing.
Chase: And that work has to happen. So it’s either going to happen on set when you’re there, and there’s pressure and talent, or you can do it beforehand. Or you can do it afterwards in post if you mess it up. So the work is always going to be there, and if you can get ahead of it, you should.
Matt: And on shoots where a re-shoot is nearly impossible, you need to know that you’re getting everything you need. And I think the other advantage of that depth of pre-production is the client is very aware of what they’re going to get. So you can very much sign off on what you’re going to be producing before you actually deliver. Which will hopefully mean that back and forth at the end of the project will be a lot smoother.
A fair bit of planning and resourceful thinking went into this one, but there were a few key pieces of kit, too:
Manfrotto Collapsible green screen
645 Fast Twin Leg Carbon Tripod
If you want to check out the full video, have a watch here. If you’re hungry for something else, we have a whole lot of other resources on how to create punchy videos on the Syrp Lab YouTube Channel. And Matt loves comments, so don’t hold back.